Tkinter library
Tkinter is Python's built-in toolkit for building desktop GUI applications — windows, buttons, text fields, and the rest of a traditional app interface, all driven from your Python variables, functions, and objects. A GUI needs a real window and display to run in, though, so unlike the rest of this field guide, the examples below aren't runnable in the browser — copy them into a local .py file to see them in action.
Install
Tkinter ships with the standard library — no extra install is needed on your own machine.
Import
tk is the near-universal alias for the base module; the themed ttk widgets (used throughout this page) are imported separately.
import tkinter as tk
from tkinter import ttk| Concept | What it is |
|---|---|
| Widget | Any single visual element — a button, label, text box, or window itself. |
| Root window | The main application window, created once with tk.Tk(), that every other widget lives inside. |
| Geometry manager | The system (pack, grid, or place) that decides where a widget appears inside its parent. |
| Event loop | The mainloop() call that keeps the window open and listening for clicks, keystrokes, and other input until it's closed. |
| Callback | A function you write that Tkinter calls automatically when something happens, like a button being clicked. |
Creating a window
Every Tkinter app starts the same way: create a root window, add widgets to it, then hand control over to the event loop with mainloop() — nothing appears on screen until that final call.
import tkinter as tk

root = tk.Tk()
root.title("Field Guide")
root.geometry("300x150")

root.mainloop()
Widgets
A widget is any single element on screen — a button, a text field, a list. Most widgets exist in two versions: a classic one straight from the original tkinter module, and a themed one from tkinter.ttk, rendered to match the operating system's native look rather than Tkinter's classic (and dated) default style. Prefer the ttk version of a widget whenever one exists — the examples throughout the rest of this page do.
A small handful of widgets have no themed equivalent and stay classic-only. Everything else has a themed ttk version, and several widgets exist only in ttk — there's no classic-Tkinter equivalent to fall back to:
| Widget | Preview | Use it for |
|---|---|---|
Label |
 |
Displaying static text or an image. |
Button |
 |
Running a function when clicked. |
Entry |
 |
A single-line text input box. |
Frame |
 |
An invisible container for grouping other widgets, so they can be laid out or shown/hidden as a unit. |
Checkbutton |
 |
An on/off toggle, usually a checkbox with a label next to it. |
Radiobutton |
 |
One option out of a set — several radio buttons sharing the same variable let the user pick exactly one. |
Combobox |
 |
An entry combined with a dropdown list of suggested values. |
Listbox |
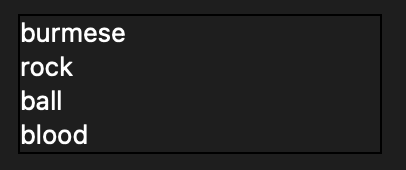 |
A scrollable list of text items the user can select one or more of. Classic-only — ttk.Treeview is the themed substitute. |
Text |
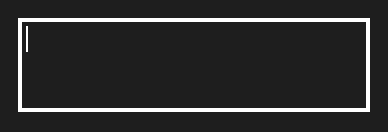 |
A multi-line, scrollable text box — for paragraphs, not just a word or two. |
Scrollbar |
 |
A slider that scrolls another widget (a Text, Listbox, or Canvas) that's taller than its visible area. |
Canvas |
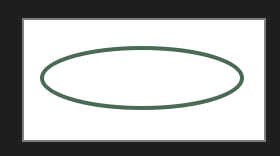 |
A blank drawing surface for shapes, lines, images, or custom graphics. |
Menu |
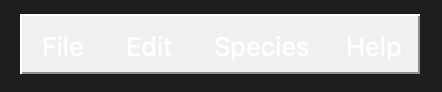 |
A dropdown menu, usually attached to the root window as a menu bar or to a widget as a right-click menu. |
Notebook |
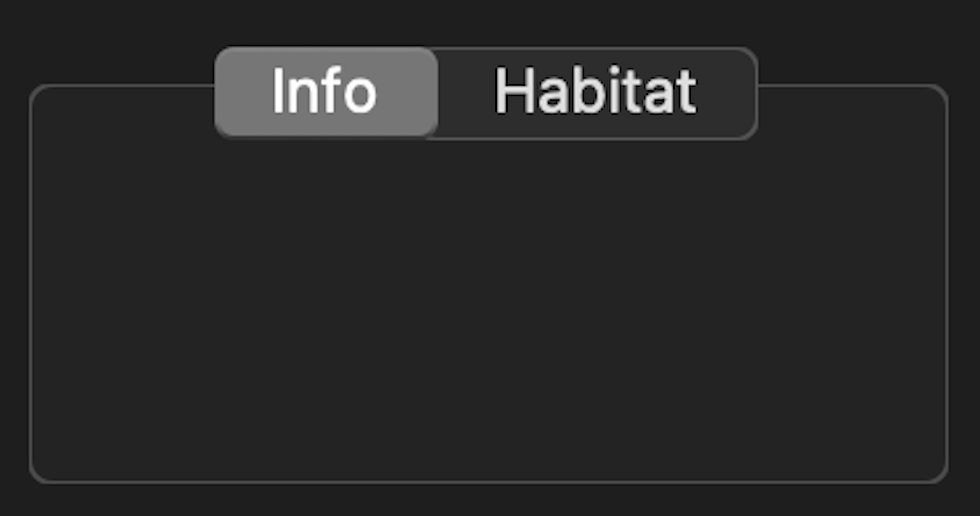 |
Tabbed pages within a single window. |
Treeview |
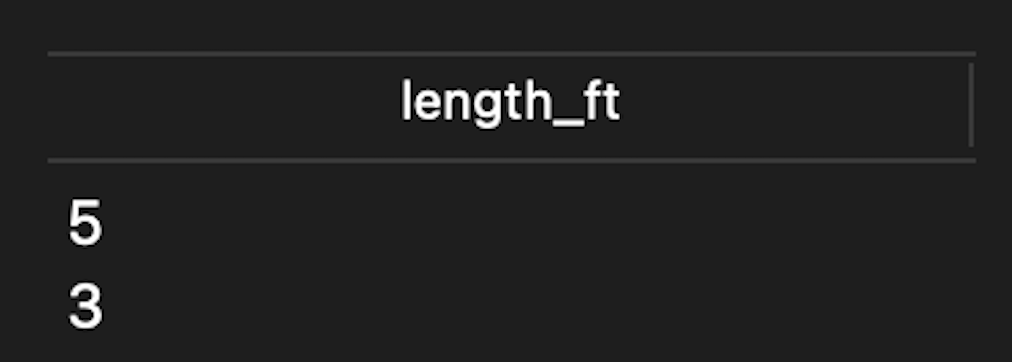 |
A table or expandable tree of rows and columns — often used as a themed substitute for Listbox too. |
Progressbar |
 |
A loading/progress indicator, determinate or animated. |
Scale |
 |
A slider for picking a number within a range by dragging. |
Spinbox |
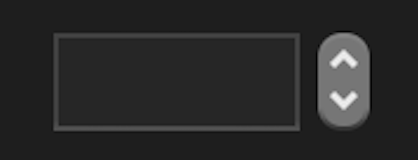 |
A text box with up/down arrows for stepping through a small range of values. |
LabelFrame |
|
A frame with a visible border and a title — for visually grouping related widgets. |
Toplevel |
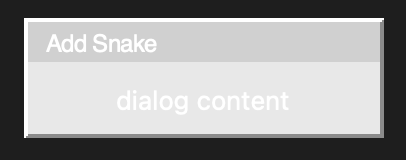 |
A separate window, layered on top of the root window — for dialogs or pop-ups. |
Message |
 |
Like a label, but automatically wraps long text across multiple lines. Classic-only — ttk.Label with wraplength set is generally used instead. |
Menubutton |
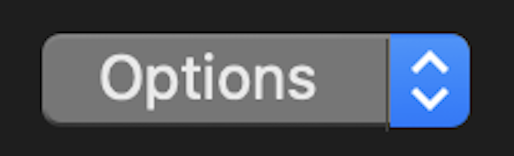 |
A button that opens a Menu when clicked, without needing a separate menu bar. |
OptionMenu |
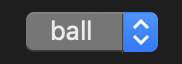 |
A dropdown for picking one value from a fixed list — a simpler alternative to Menubutton. |
Separator |
 |
A thin dividing line, horizontal or vertical, for visually splitting up a layout. |
PanedWindow |
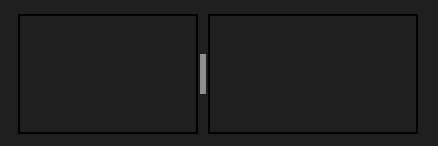 |
A container that splits space between widgets with a draggable divider between them. |
Sizegrip |
 |
A draggable handle (usually bottom-right corner) for resizing the window. |
from tkinter import ttk

label = ttk.Label(root, text="ball python")
button = ttk.Button(root, text="Run")
entry = ttk.Entry(root)
label.pack()
button.pack()
entry.pack()
Label
Displays static text (or an image) — no input, no clicks. Mainly used for headings, descriptions, or showing output from other widgets.
label = ttk.Label(root, text="burmese python")
label.pack()
import tkinter as tk
from tkinter import ttk
root = tk.Tk()
label = ttk.Label(root, text="burmese python")
label.pack()
root.mainloop()Button
Runs a function — passed in as command — every time it's clicked. The function itself is defined separately; the button just calls it, with no arguments.
def on_click():
    print("clicked!")

button = ttk.Button(root, text="Identify Species", command=on_click)
button.pack()
import tkinter as tk
from tkinter import ttk
def on_click():
print("identifying species...")
root = tk.Tk()
button = ttk.Button(root, text="Identify Species", command=on_click)
button.pack()
root.mainloop()Entry
A single-line text input box. Call .get() on it at any point (usually inside a button's callback) to read whatever the user has typed so far.
entry = ttk.Entry(root)
entry.pack()
species_name = entry.get()    # whatever the user typed
import tkinter as tk
from tkinter import ttk
def show_name():
print("you entered:", entry.get())
root = tk.Tk()
entry = ttk.Entry(root)
entry.pack()
button = ttk.Button(root, text="Submit", command=show_name)
button.pack()
root.mainloop()Listbox
Displays several lines of text at once and lets the user select one (or more) of them. Populate it by calling .insert() once per item, usually looping over a list. It's one of the widgets with no ttk version, so it stays tk.Listbox (ttk.Treeview is the themed alternative for anything more table-like).
listbox = tk.Listbox(root)
for s in species:
    listbox.insert(tk.END, s)    # burmese  rock  ball  blood
listbox.pack()
import tkinter as tk
species = ["burmese", "rock", "ball", "blood"]
root = tk.Tk()
listbox = tk.Listbox(root)
for s in species:
listbox.insert(tk.END, s)
listbox.pack()
root.mainloop()Layout managers
A widget doesn't appear on screen until you tell Tkinter where to put it, using one of three geometry managers. Mixing more than one inside the same parent widget causes layout bugs, so pick one per container.
| Manager | Syntax | Use it for |
|---|---|---|
pack |
widget.pack() |
Stacking widgets simply, top-to-bottom or side-to-side — the quickest option for simple layouts. |
grid |
widget.grid(row=0, column=0) |
Lining widgets up in rows and columns, like a form — the most common choice for anything beyond a trivial layout. |
place |
widget.place(x=10, y=10) |
Pinning a widget to an exact pixel position — rarely needed, and doesn't resize gracefully with the window. |
pack
Adds a widget to one edge of its parent, and stacks the next widget next to it. top by default, or left/right/bottom. It's the simplest manager, but gives you the least control over precise alignment.
ttk.Label(root, text="species:").pack(side="left")
ttk.Entry(root).pack(side="left")
import tkinter as tk
from tkinter import ttk
root = tk.Tk()
ttk.Label(root, text="species:").pack(side="left")
ttk.Entry(root).pack(side="left")
root.mainloop()grid
Places a widget at a given row/column inside its parent. The standard choice for form-like layouts, since every widget can be aligned independently of the order it was created in.
ttk.Label(root, text="species:").grid(row=0, column=0)
ttk.Entry(root).grid(row=0, column=1)
ttk.Label(root, text="length (ft):").grid(row=1, column=0)
ttk.Entry(root).grid(row=1, column=1)
import tkinter as tk
from tkinter import ttk
root = tk.Tk()
ttk.Label(root, text="species:").grid(row=0, column=0)
ttk.Entry(root).grid(row=0, column=1)
ttk.Label(root, text="length (ft):").grid(row=1, column=0)
ttk.Entry(root).grid(row=1, column=1)
root.mainloop()place
Pins a widget at an exact x/y pixel offset from its parent's corner. It gives pixel-perfect control but doesn't adapt when the window is resized, so pack or grid is usually the better default.
ttk.Label(root, text="ball python").place(x=20, y=40)import tkinter as tk
from tkinter import ttk
root = tk.Tk()
root.geometry("200x100")
ttk.Label(root, text="ball python").place(x=20, y=40)
root.mainloop()Configuring widgets
Every widget has a set of options that control its appearance and behavior — text, width, state, and dozens more depending on the widget type. Set them when you create the widget, or change them afterward with .configure() (or the equivalent bracket/dictionary syntax) and read them back with .cget().
label = ttk.Label(root, text="ball python")
label.configure(text="burmese python")   # change it later
label["text"]                            # read it back — "burmese python"
Reading and changing options
.configure(option=value) changes one or more options after a widget already exists. Handy for updating a Label in response to a button click, or disabling an Entry while something else is running. .cget("option") (or the shorthand widget["option"]) reads a single option's current value back out.
label = ttk.Label(root, text="ball python")
label.configure(text="burmese python")
current = label.cget("text")    # "burmese python"
also_current = label["text"]    # same thing, dict-style
import tkinter as tk
from tkinter import ttk
root = tk.Tk()
label = ttk.Label(root, text="ball python")
label.pack()
def rename():
label.configure(text="burmese python")
print("now showing:", label.cget("text"))
ttk.Button(root, text="Rename", command=rename).pack()
root.mainloop()Handling events
A GUI sits idle until the user does something — Tkinter reacts to that input through callbacks: functions you write once, and hand to Tkinter to call automatically when the right event happens. Every one of those callbacks runs on the same event loop that keeps the window responsive, so a callback that blocks for a while (a long computation, time.sleep(), a network request) freezes the entire interface until it returns — use root.after() to schedule work in small chunks instead of blocking outright.
def on_click():
    print("button pressed")

ttk.Button(root, text="Go", command=on_click).pack()
Command callbacks
Most interactive widgets accept a command argument that runs whenever the widget is activated. Button, Checkbutton, Radiobutton — pass a function reference (no parentheses, since Tkinter calls it for you).
def show_info():
    print(f"{snake['species']} — {snake['length_ft']} ft")

ttk.Button(root, text="Show Info", command=show_info).pack()
import tkinter as tk
from tkinter import ttk
snake = {"species": "ball python", "length_ft": 3, "venomous": False}
def show_info():
print(f"{snake['species']} — {snake['length_ft']} ft")
root = tk.Tk()
ttk.Button(root, text="Show Info", command=show_info).pack()
root.mainloop()Binding events
.bind() attaches a callback to a named event on any widget. command only covers a widget's one "main" action — for anything else (a key press, mouse movement, clicking a label), use .bind() instead. The callback receives an event object describing what happened.
def on_key(event):
    print("you typed:", event.char)

entry.bind("<KeyPress>", on_key)
import tkinter as tk
from tkinter import ttk
def on_key(event):
print("you typed:", event.char)
root = tk.Tk()
entry = ttk.Entry(root)
entry.bind("<KeyPress>", on_key)
entry.pack()
root.mainloop()Virtual events
Tkinter defines virtual events — written with double angle brackets — for higher-level things a widget can do, like a Listbox selection changing or a Notebook tab switching. They behave exactly like any other .bind() target, but describe what happened rather than which key or button caused it, so the same code keeps working across platforms.
listbox.bind("<<ListboxSelect>>", on_select)import tkinter as tk
species = ["burmese", "rock", "ball", "blood"]
def on_select(event):
selection = event.widget.curselection()
print("selected:", species[selection[0]])
root = tk.Tk()
listbox = tk.Listbox(root)
for s in species:
listbox.insert(tk.END, s)
listbox.bind("<<ListboxSelect>>", on_select)
listbox.pack()
root.mainloop()Styling with ttk
Classic Tkinter widgets render with Tk's original 1990s look, which stands out from every other app on a modern OS — this is exactly the gap ttk closes by delegating drawing to the OS's native theme engine. A ttk.Style object lets you customize colors and fonts on top of that native look without losing it.
style = ttk.Style()
style.configure("TButton", font=("Helvetica", 12))
ttk.Button(root, text="Identify", style="TButton").pack()
Customizing a style
Every ttk widget draws itself according to a named style (TButton, TLabel, and so on by default). style.configure() changes a style's look; style.theme_use() switches the whole underlying theme. Defining a new style name (like "Accent.TButton" above) lets one specific widget stand out without changing every button in the app.
style = ttk.Style()
style.theme_use("clam")
style.configure("Accent.TButton", foreground="white", background="#3f6b52")
ttk.Button(root, text="Save", style="Accent.TButton").pack()
import tkinter as tk
from tkinter import ttk
root = tk.Tk()
style = ttk.Style()
style.theme_use("clam")
style.configure("Accent.TButton", foreground="white", background="#3f6b52")
ttk.Button(root, text="Save", style="Accent.TButton").pack()
root.mainloop()Dialogs
Tkinter includes a set of ready-made pop-up windows for common tasks — asking a yes/no question, showing an alert, or picking a file — instead of building a Toplevel window by hand every time.
from tkinter import messagebox, filedialog

messagebox.showinfo("Field Guide", "Species saved.")
filedialog.askopenfilename()
Message boxes
Covers simple alerts and confirmations. showinfo/showwarning/showerror display a message with an OK button, while askyesno/askokcancel return True or False based on the user's choice.
messagebox.showinfo("Saved", "burmese python added to your log.")
confirmed = messagebox.askyesno("Delete?", "Remove this entry?")
import tkinter as tk
from tkinter import ttk, messagebox
root = tk.Tk()
def save():
messagebox.showinfo("Saved", "burmese python added to your log.")
def delete():
if messagebox.askyesno("Delete?", "Remove this entry?"):
print("entry removed")
ttk.Button(root, text="Save", command=save).pack()
ttk.Button(root, text="Delete", command=delete).pack()
root.mainloop()File dialogs
Opens the OS's native file picker. askopenfilename() returns the path the user chose to open; asksaveasfilename() returns a path to save to, prompting for a filename if it doesn't already exist.
path = filedialog.askopenfilename(filetypes=[("Text files", "*.txt")])
save_path = filedialog.asksaveasfilename(defaultextension=".txt")
import tkinter as tk
from tkinter import ttk, filedialog
root = tk.Tk()
def open_file():
path = filedialog.askopenfilename(filetypes=[("Text files", "*.txt")])
print("opened:", path)
ttk.Button(root, text="Open", command=open_file).pack()
root.mainloop()Introspecting widgets
Every widget can report details about itself — its size, position, class, or place in the widget hierarchy — through a family of winfo_* methods. Useful for debugging a layout, or for writing code that adapts to a widget's actual on-screen size rather than a hardcoded guess.
label.winfo_width()     # current width in pixels
label.winfo_class()     # "TLabel"
label.winfo_children()  # direct child widgets, if any
winfo methods
winfo_width()/winfo_height() return a widget's current on-screen size in pixels. Note that right after creation this can still be 1, before the geometry manager has actually placed it (call root.update() first if you need an accurate reading immediately). winfo_class() returns the underlying Tk widget class name, and winfo_children() lists every widget placed directly inside it — handy for looping over a container's contents without keeping a separate list yourself.
print(label.winfo_width(), label.winfo_height())
print(label.winfo_class())
print(root.winfo_children())
import tkinter as tk
from tkinter import ttk
root = tk.Tk()
label = ttk.Label(root, text="ball python")
label.pack()
root.update()
print("size:", label.winfo_width(), label.winfo_height())
print("class:", label.winfo_class())
print("root's children:", root.winfo_children())
root.mainloop()Putting it together
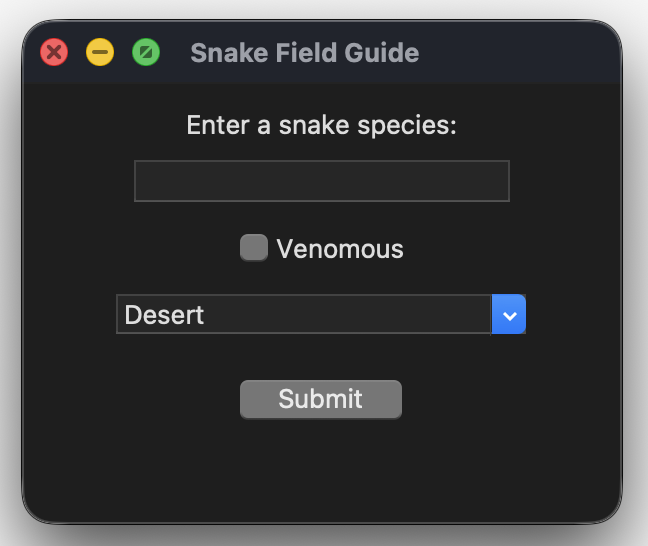
A handful of widgets from the table above — Label, Entry, Checkbutton, Combobox, Button — cover most of what a simple data-entry form needs. This example combines them into one small app: type a species name, toggle whether it's venomous, pick a habitat from a dropdown, then click Submit to display the result.
A simple form
Each widget stores its value differently, so the Submit callback reads each one its own way. Entry is read with .get() directly, Checkbutton is backed by a BooleanVar (is_venomous) read separately from the widget itself, and Combobox is also read with .get(). The Submit button's callback pulls all three together and updates a Label to show the result — the same command= pattern covered earlier, just wired to several widgets instead of one. Building the widgets is split into its own build_form() function, called once from main(), rather than left as loose top-level code.
import tkinter as tk
from tkinter import ttk


def build_form(root):
    # Label — just displays text
    label = ttk.Label(root, text="Enter a snake species:")
    label.pack(pady=(10, 0))

    # Entry — a single-line text box for user input
    entry = ttk.Entry(root)
    entry.pack(pady=5)

    # Checkbutton — an on/off toggle, backed by a BooleanVar
    is_venomous = tk.BooleanVar()
    checkbutton = ttk.Checkbutton(root, text="Venomous", variable=is_venomous)
    checkbutton.pack(pady=5)

    # Combobox — a dropdown with a fixed set of choices
    habitat = ttk.Combobox(root, values=["Desert", "Rainforest", "Grassland", "Wetland"])
    habitat.set("Desert")  # default selection
    habitat.pack(pady=5)

    # Label to show the result after clicking Submit
    result_label = ttk.Label(root, text="")
    result_label.pack(pady=5)

    def on_submit():
        species = entry.get()
        venomous = is_venomous.get()
        result_label.config(
            text=f"{species or '(no name)'} | venomous: {venomous} | habitat: {habitat.get()}"
        )

    # Button — runs on_submit() when clicked
    button = ttk.Button(root, text="Submit", command=on_submit)
    button.pack(pady=10)


def main():
    root = tk.Tk()
    root.title("Snake Field Guide")
    root.geometry("300x220")

    build_form(root)

    root.mainloop()  # keeps the window open and responsive


if __name__ == "__main__":
    main()